Lessons · Lesson E3 · Electricity basics · 15 min
LEDs and the right resistor
Which way round an LED goes, and how to pick the resistor that keeps it safe, with one formula and a calculator. About 15 minutes.
An LED has a direction
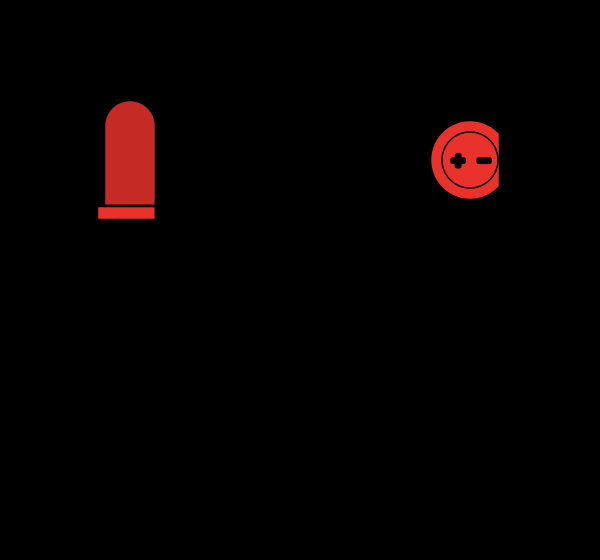
LED stands for light-emitting diode, and a diode is a one-way gate for current [1][2]. That gives the two legs different names: the anode (+), where current enters, and the cathode (−), where it leaves [1].
How to tell them apart [2][3]:
- The longer leg is the anode (“+”).
- Look at the rim of the casing: one side is flattened. The leg on that side is the cathode (“−”). Useful when the legs have been cut to the same length.
Wired the wrong way round, an LED simply does nothing, and it takes real abuse to hurt it like that [1]. Dark LED? Turn it 180° and try again.
Forward voltage: what the LED keeps for itself
When an LED is on, it uses up a roughly fixed amount of voltage. This is its forward voltage (written Vf) [4][5]. The resistor gets whatever the supply has left [4][3].
How much is it? It depends on the LED, and the colour is part of that:
- Red, yellow, orange and light-green LEDs fall around 1.85 V to 2.5 V. 2.2 V is a decent average [4].
- Across all colours, the range runs from about 1.6 V up to over 3 V [3], or 1.7 V to 3.4 V by another source [5].
- A red LED is often taken at around 1.8 V to 2.2 V [4][5].
Always look at the packaging or datasheet of your own LED. That number is the one to use. If you do not have it, start from the red LED value of about 2 V, and measure the real voltage with your multimeter once the LED is lit (lesson 2).
The LED also has a current limit. Basic LEDs are usually rated for about 20 mA continuous, and you should stay at or below that [5][3]. This lesson aims for 10 mA: clearly lit, with room to spare.

The formula: Ohm’s law on the resistor
In the loop (supply, resistor, LED in a row) the voltages must balance: what the supply provides equals what the parts use up [4]. The LED uses Vf, so the resistor must absorb the rest:
VR = VS − VF
Now apply Ohm’s law (lesson 1, “Voltage, current, resistance”) to the resistor only. The same current flows through every part of a single loop [9], so the resistor carries the current you want in the LED:
R = (VS − VF) ÷ I
Careful: Ohm’s law is for the resistor. The LED itself does not follow it: like any diode, its current is not proportional to its voltage [10].
Worked example. Supply 5 V, red LED at 2 V, target 10 mA (0.010 A):
- Voltage left for the resistor: 5 − 2 = 3 V
- R = 3 ÷ 0.010 = 300 Ω
Same method as the SparkFun example: 9 V supply, 1.8 V LED, 10 mA gives about 720 Ω [5].
What if the value is a bit off? It does not have to be exact. A slightly smaller resistor gives a brighter light and a slightly shorter LED life. A larger one gives a dimmer light [3].

Standard values, then 3.3 V and 5 V
You will not find a 300 Ω resistor in a shop. Resistors are sold in preferred values so that manufacturers and shops can share the same few. The E12 series has 12 values per power of ten, with 10% tolerance [7]:
10 · 12 · 15 · 18 · 22 · 27 · 33 · 39 · 47 · 56 · 68 · 82 (then × 10, × 100, × 1,000: 100, 120, … 820, 1,000, 1,200, …)
Our rule: round up to the next E12 value. More resistance means less current [3], so rounding up keeps the LED on the safe side. This is our own rule of thumb, not a standard.
Three examples at 10 mA. Both 5 V and 3.3 V are common supply voltages.
| Supply | LED (Vf) | Calculation | Standard pick | Real current |
|---|---|---|---|---|
| 5 V | red, 2 V | (5 − 2) ÷ 0.010 = 300 Ω | 330 Ω | 3 ÷ 330 ≈ 9.1 mA |
| 3.3 V | red, 2 V | (3.3 − 2) ÷ 0.010 = 130 Ω | 150 Ω | 1.3 ÷ 150 ≈ 8.7 mA |
| 5 V | an LED rated 3.2 V | (5 − 3.2) ÷ 0.010 = 180 Ω | 180 Ω (E12) | 1.8 ÷ 180 = 10 mA |
When the supply is close to Vf, be careful. With 3.3 V and an LED of 3.2 V, only 0.1 V is left for the resistor, so a tiny difference in the LED’s real voltage changes the current a lot. With an LED of 3.4 V on 3.3 V, the supply is below the forward voltage, which is what an LED needs to light up [5]: it will be dim or may not light, and the current cannot be set reliably, whatever the resistor. If the maths gives you a tiny or negative resistor value, choose a different LED or a higher supply.


Try it, and why never without a resistor
Set a supply, a Vf and a target current. The calculator shows the exact value, the E12 pick and the real current.
Enter a value between 1.5 V and 3.6 V.
Use the value on your LED's packaging or datasheet. No number? Start at 2.0 V (red).
- Red: often 1.8–2.2 V
- Red, yellow, orange, light green: about 1.85–2.5 V (average 2.2 V)
- All colours: about 1.6 V to over 3 V
R = (Vs − Vf) ÷ I
R = (5 V − 2.0 V) ÷ 0.010 A = 300 Ω
Exact value
300 Ω
Next E12 value (round up)
330 Ω
Resulting current
≈ 9.1 mA
Is this exact?
The LED’s forward voltage really changes with the current and from one LED to the next. Treating it as fixed is close enough to choose a resistor.
Why a resistor every time. An LED cannot hold its own current down. Wire it directly across a supply and it pulls all the current the supply will give, until it burns out [6]. The resistor is the part that caps the current [6][3].
Quick checks if something looks wrong:
- LED dark: flipped around? Supply below Vf? Gap in the loop (lesson 2)?
- Resistor or LED getting hot: switch off, look for a short or a resistor that is far too small [3][8].
- Never use a resistor “just because it was in the box”: do the calculation, even a quick one.
Check yourself
Three short questions. Nothing is saved, take your time.
You are holding an LED with both legs intact. Which leg goes toward the positive side of the supply?
- The shorter leg
- The longer leg
- Either one, they are the same
Supply 5 V, red LED with a forward voltage of about 2 V, target current 10 mA. Which standard E12 resistor do you pick?
- 220 Ω
- 330 Ω
- 1 kΩ
Why should an LED never be connected straight to a battery or supply with no resistor?
- It will only light dimly
- Nothing limits the current, so it draws far too much and burns out
- The LED will work backwards
Show the answer
Nothing limits the current, so it draws far too much and burns out. An LED has no built-in way to limit its own current. Without a resistor it takes all the current the supply allows and burns out [6].
Sources
Show the 10 sources
- Adafruit, “All About LEDs”, page “What is an LED?” (anode and cathode; longer lead to the more positive voltage; a reversed LED does not light and is hard to damage) — https://learn.adafruit.com/all-about-leds/what-is-an-led
- SparkFun, “Polarity” (LED longer leg is the anode; the pin nearest the flat edge is the cathode) — https://learn.sparkfun.com/tutorials/polarity
- All About Circuits, Semiconductors, “Special-Purpose Diodes” (flat side and short lead are the cathode; forward drop from about 1.6 V to over 3 V depending on colour; typical 20 mA; series dropping resistor; R = E/I worked example; values need not be precise; smaller resistor means brighter light and shorter life) — https://www.allaboutcircuits.com/textbook/semiconductors/chpt-3/special-purpose-diodes/
- Adafruit, “All About LEDs”, page “Forward Voltage and KVL” (loop voltages balance; red, yellow, orange and light-green LEDs 1.85–2.5 V, average 2.2 V; the resistor absorbs the rest) — https://learn.adafruit.com/all-about-leds/forward-voltage-and-kvl
- SparkFun, “Resistors” (forward voltage usually between 1.7 V and 3.4 V depending on colour; about 20 mA maximum for basic LEDs; the series-resistor equation; 9 V, 1.8 V, 10 mA example giving about 720 Ω; red LED around 1.8 V) — https://learn.sparkfun.com/tutorials/resistors
- SparkFun, “Light-Emitting Diodes (LEDs)” (an LED connected straight to a supply destroys itself; resistors limit the current) — https://learn.sparkfun.com/tutorials/light-emitting-diodes-leds
- All About Circuits, Reference, “Resistor Color Codes” (E-series preferred values; E12 list; 10% tolerance) — https://www.allaboutcircuits.com/textbook/reference/chpt-2/resistor-color-codes/
- SparkFun, “What is a Circuit?” (hot parts or sudden burn-out: switch off and look for short circuits; a wrong resistor value can overload an LED) — https://learn.sparkfun.com/tutorials/what-is-a-circuit
- All About Circuits, Volume I (DC), “Voltage and Current” (the amount of current is the same at any point of a single loop) — https://www.allaboutcircuits.com/textbook/direct-current/chpt-1/voltage-current/
- OpenStax, University Physics Volume 2, section 9.4 “Ohm’s Law” (ohmic and nonohmic parts; a diode is nonohmic) — https://openstax.org/books/university-physics-volume-2/pages/9-4-ohms-law